Random Access Memory commonly known as RAM, is a volatile memory which means it stores the data for limited period of time. Once you shut down your pc the data will be lost. However RAM is very important to your pc as it makes your computer faster. You can assume the speed of RAM by comparing it with hard disk. RAM is comparatively upto 20 times faster than hard disk. Any task in your pc is accessible faster with the help of RAM.
So what if you found installed RAM is 8 GB but usable is only 3.4GB or even less. Here we going to discuss and solve this issue for you.
Fix Usable RAM is less than Installed RAM in your Windows PC
#Method 1 – By modifying RAM Usage
In order to modify RAM you need to open the configuration of your computer. So for that, simultaneously press windows key + R key to open the run command in your computer. Once run command dialog box is open type “msconfig” and hit the enter button to open the configuration of your computer.

Once configuration is opened, choose Boot tab and click on Advanced Options to open the options for your RAM

In Advanced options, you are welcome with “BOOT advanced options” where you need to make certain changes in order to get your RAM back.

In BOOT advanced options, check/tick mark both the available options :
1) No. of Processors
2) Maximum Memory
Once you check both the options, open the drop down box from the number of processors and choose maximum number and in maximum memory choose maximum available memory in your computer in MB size.
For example : If your memory is 4GB than choose 1024X4=4096MB
To know the available memory you need to right click on This PC and choose Properties. Once windows is open, your available RAM is displayed like this :

Once you get the maximum RAM type the data in Advanced BOOT options and hit the OK button to proceed.
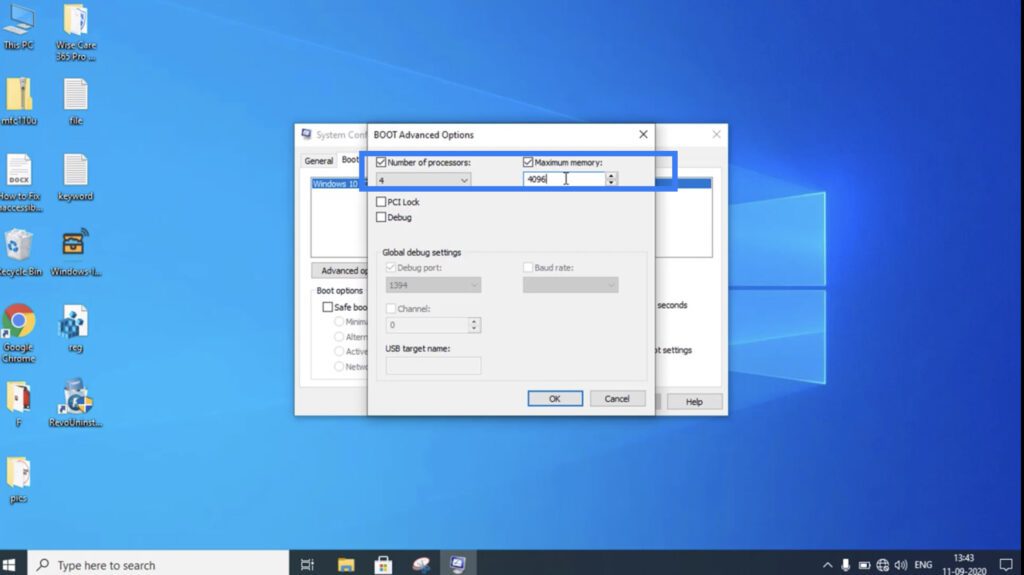
Now save all the changes made and restart your computer to take the changes taken place.
#Method 2 – By changing BIOS settings
Sometimes you need to make sure that your GPU is not eating up your RAM. Your dedicated or external GPU is the culprit which eats up your RAM and left little amount of RAM for your computer process. So let’s go ahead and solve by changing BIOS settings.
Open your BIOS setup by either pressing the delete key, F2 key or F12 key depending upon the model and brand of your computer. For exact key please refer to your computer brand.
Once you enter into your BIOS menu, choose or find the Config tab as shown below :
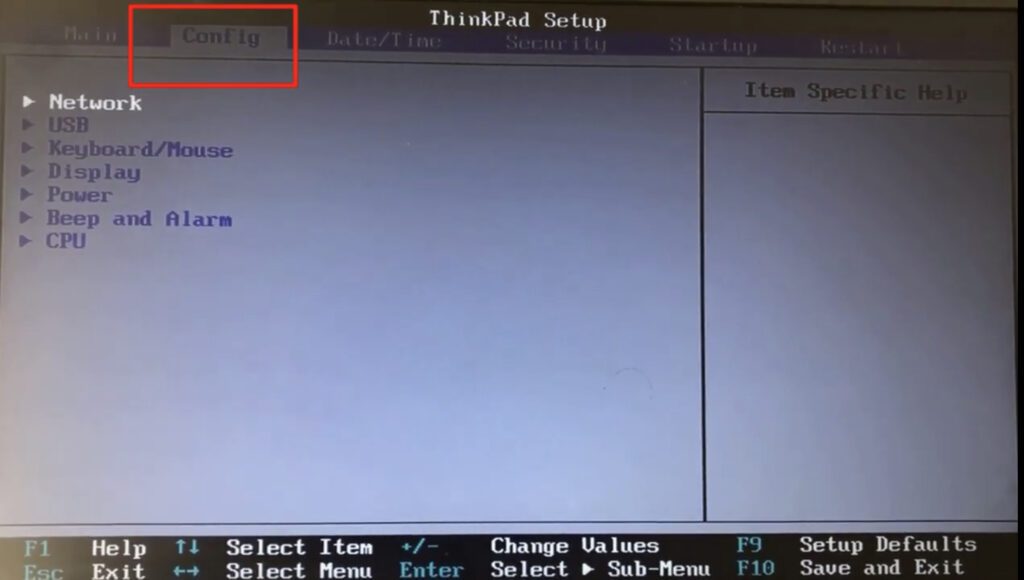
In Config tab choose the Display option to check the graphic memory used by your computer.

Once you choose display tab, hit the enter key to find the maximum and minimum memory that is Available for your graphic card. If drop down available choose the minimum amount of memory for graphic card. If you won’t find any display than find for the following terms and choose the minimum amount of RAM.
1) iGPU
2) Internal Graphics
3) Onboard Graphics
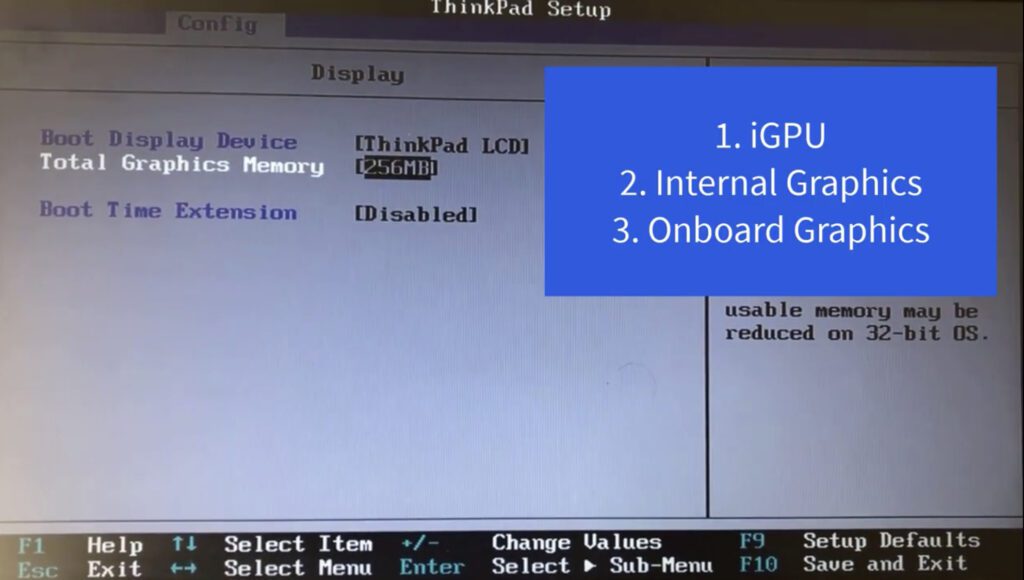
Once completed, press the F10 key to save and exit the bios settings from your PC
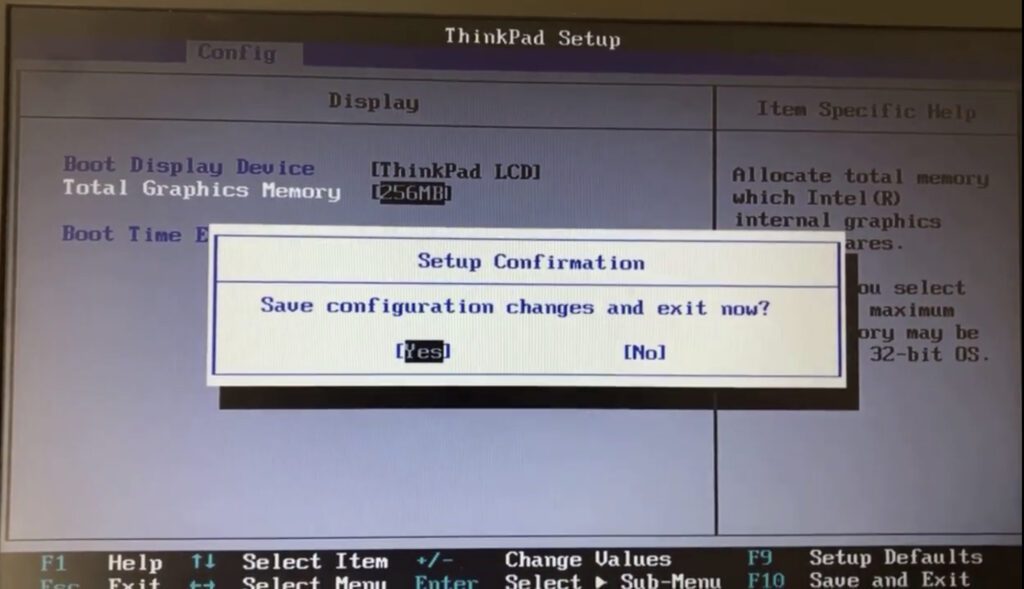
Restart your PC and check for the Resolution.
#Method 3 – By running memory diagnostic tool
If the problem is still persists, our last option is to check for your memory problem by running inbuilt memory diagnostic tool it’s because the only problem left is your hardware which is either RAM or your hard disk that is causing this issue.
In order to run memory diagnostic tool, click on the start menu and in the search bar type “diagnose” to open the search options. From here choose first option “Diagnose your computer memory problem”

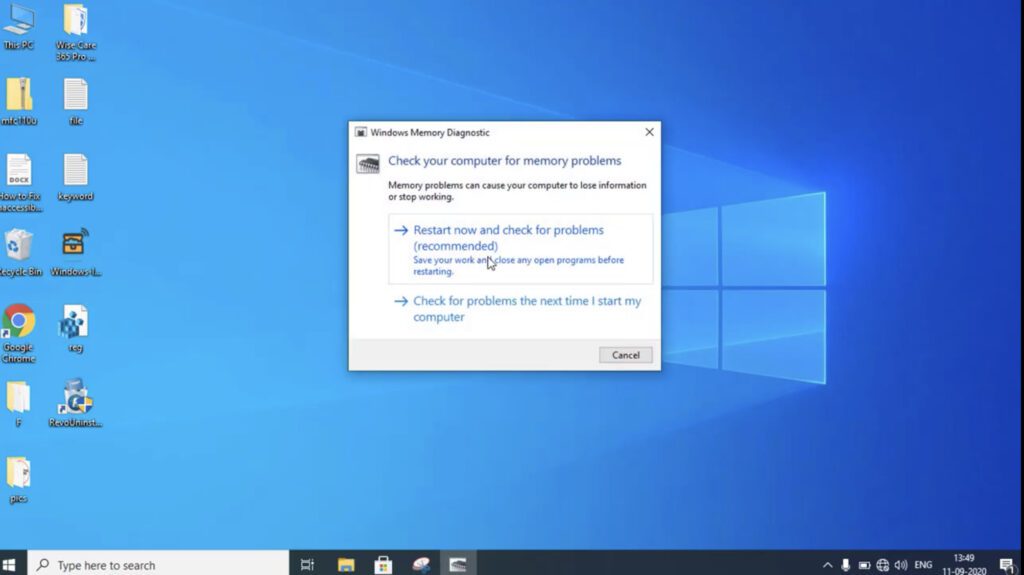
It will open up a diagnostic tool windows for you and ask you to Restart your PC to start the diagnostic.
choose the default option, which is restart and check for problems.
Once your computer is restarted the tool will run automatically and will diagnose your computer for any memory problem and provide you detailed report.
That’s all for my side. Still face any kind of issue or unable to understand kindly comment below for further resolution.


