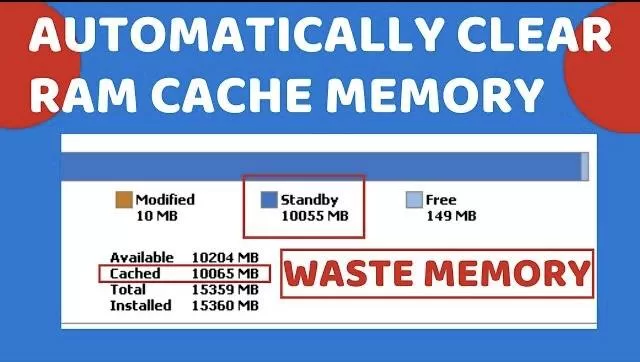
Cache Memory in Windows pc is a type of RAM but not DRAM(we are familiar with RAM) that is extremely fast almost 100 times faster than RAM as cache memory is made up of flip-flops while RAM uses the capacitors which are slow and needs to be restored once the data is retrieved from them. Cache memory acts as a buffer between the RAM and CPU. Now in order to run fast and act quickly system stores some data in SRAM as cache memory so that it’s pretty easy to access RAM than to access your hard drive which increase the speed of your system. However with time more and more data stored in cache memory with eats up your RAM so it’s necessary to clear the Cache RAM memory time to time.
So here in this article we gonna clear the cache memory automatically just by creating the simple task.
Here is the video description of step by step on how to automatically clear cache memory in Windows 10. Please have a look and subscribe to our channel if it’s worth it
#Step – 1
In order to Clear the RAM cache memory automatically you need to assign a task in your system with automatic startup with the help of cache memory cleaner. First you need to do is to download the program.
So first of all open your web browser like google chrome, Firefox or internet explorer and open a website to download the program “Empty Stand By List” from the link below

Click on the link “Download” as shown in the image above and save the program wherever you want.
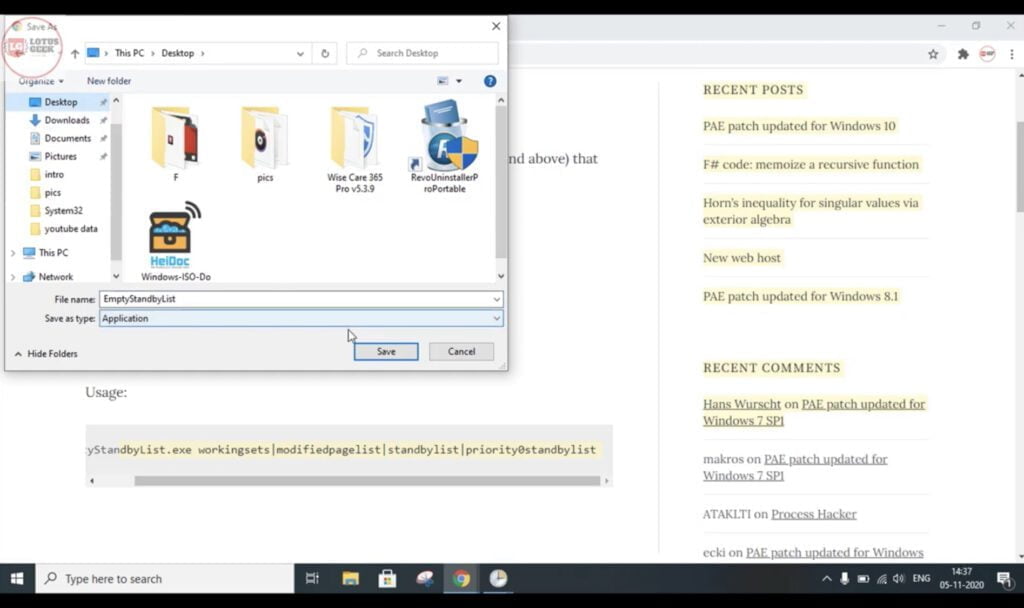
Program is just of 136kb so it won’t take much space to store. Now click on the save button after providing the path to save the program.
#Step – 2
As you have download the program, now we will go ahead and give directions to perform the action. Now click on the search box next to start menu and type “Task Scheduler” as shown below
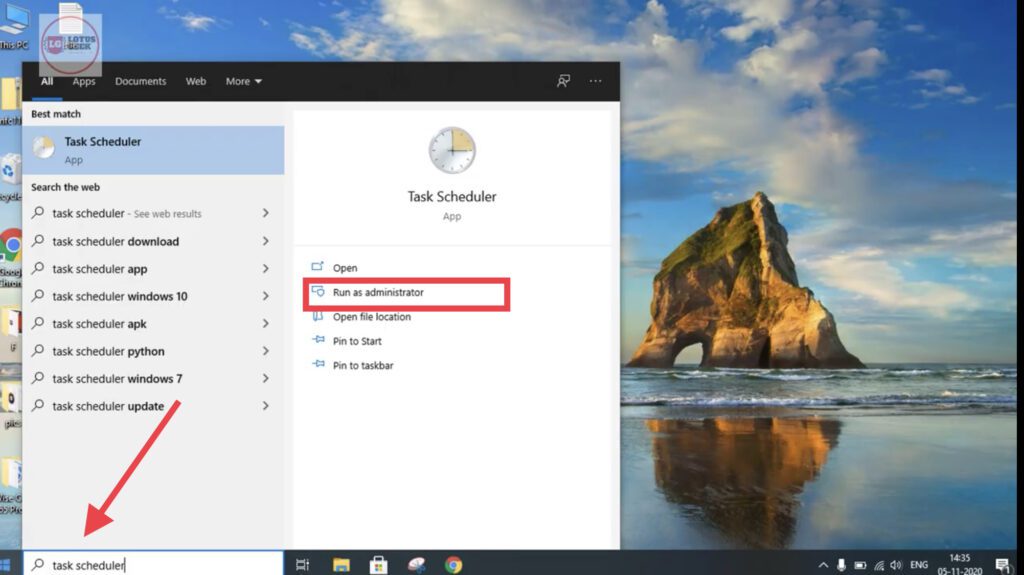
Choose “Run as administrator” option to run the “Task Scheduler” in administrator mode.
In Task Scheduler Window, you are welcome with three panes : Left, Middle and Right pane. In the right pane, click on “Create Task” option as shown below :

Now in the create task window, give a name to the task as “Cache Cleaner” as shown in the image. After assigning the name click on “Change user or Group” option available in Security Options.
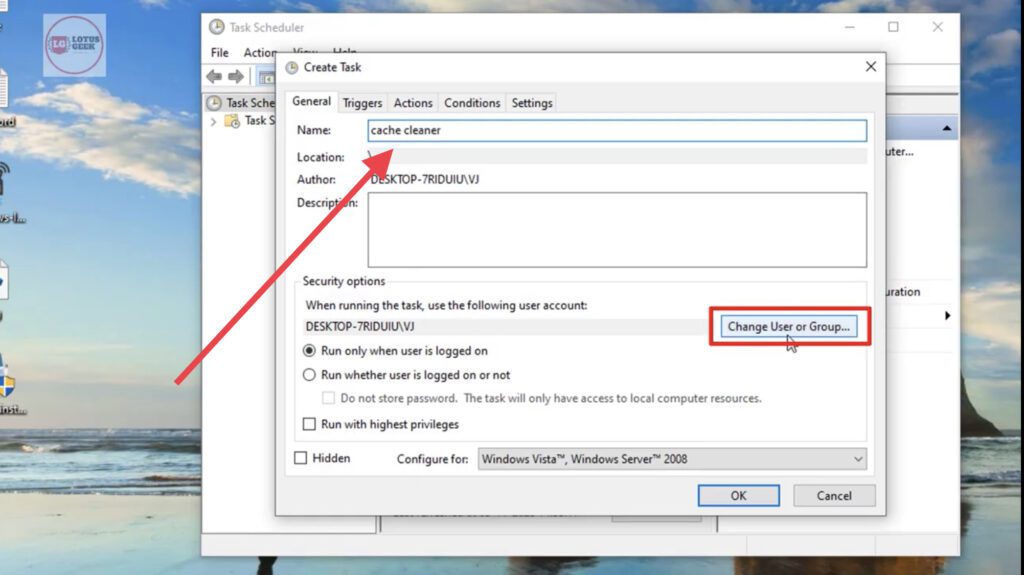
In “Change User or Group” Window click on “Advanced” tab to open the advanced properties of the task

Now in advanced properties, first click on “Find now” tab and than from the “search result” section scroll down and find “system”
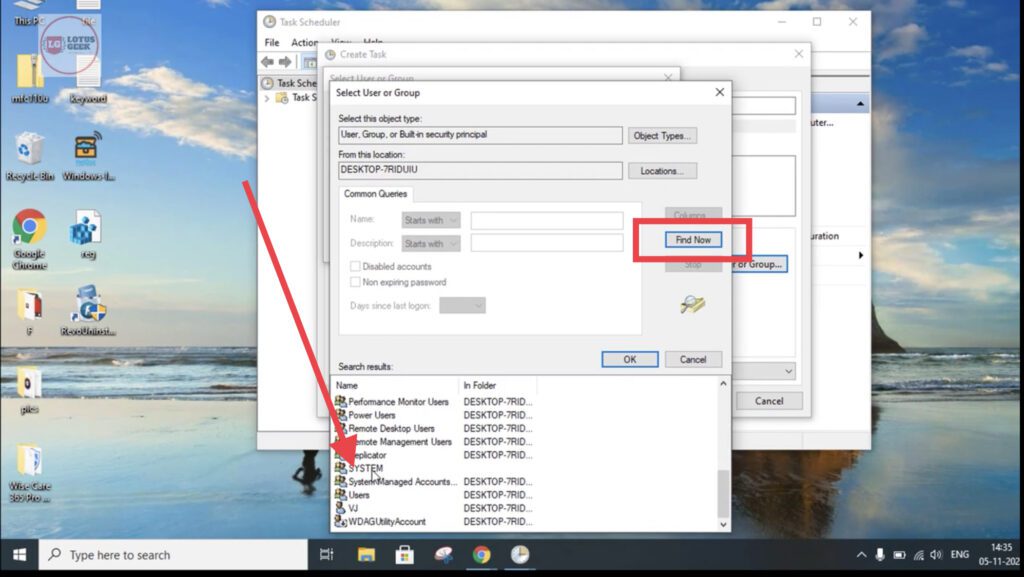
Double click on the “System” and than hit the Ok button to select the user as “System” for this particular task. In the “General” tab check mark the option “Run with highest privileges”
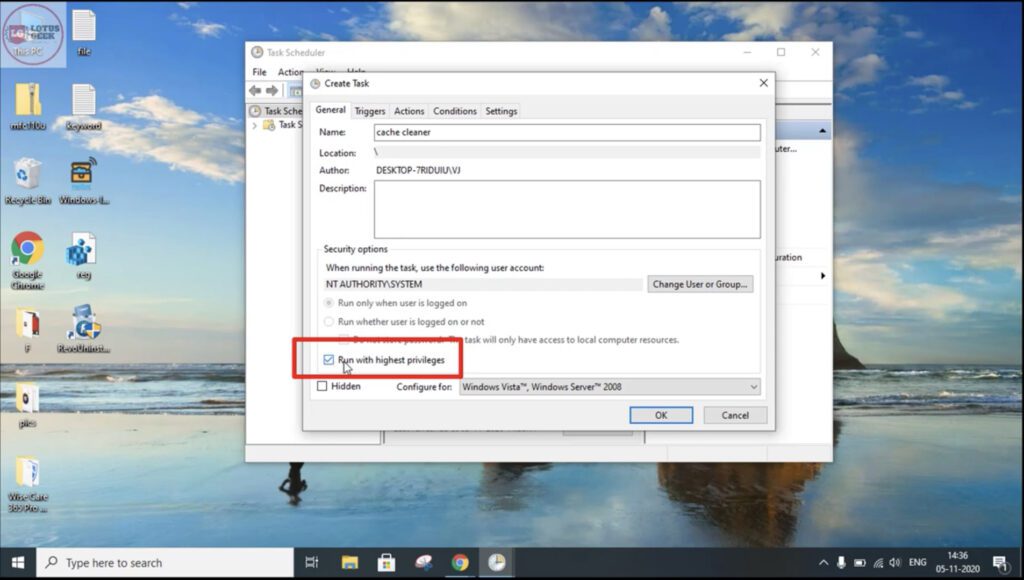
From the options “Configure for” choose your windows type that you are currently using from Windows vista to Windows 10 as shown in the image below.

#Step – 3
Now go ahead and choose “Trigger” tab in the same window and click on the “New” tab to open the trigger settings.
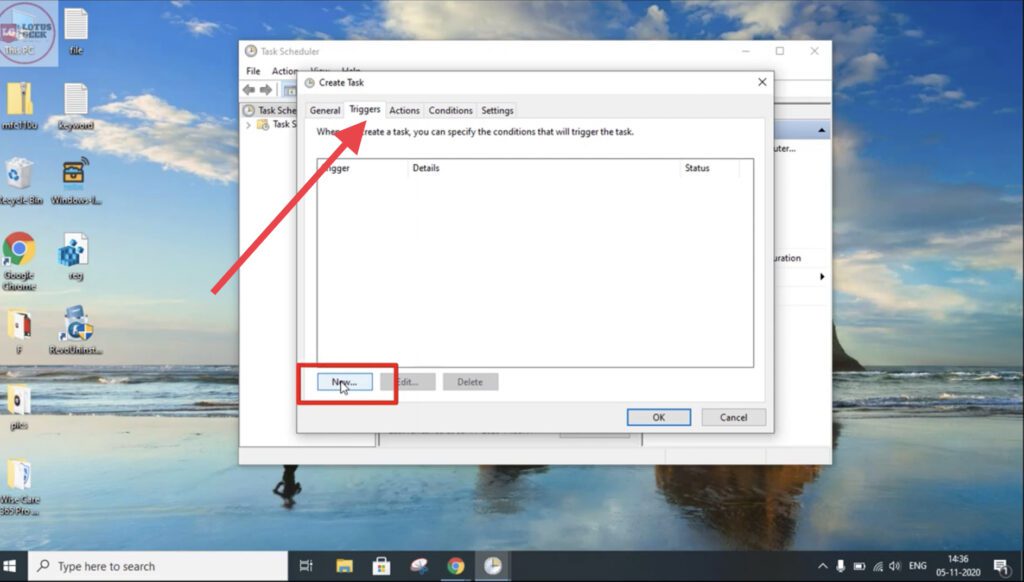 Once you click on “New” tab a window will open as shown below. From here in the “Advanced Settings” choose “Repeat Task Every 5minute” and “for a duration of Indefinately”

next is tick mark on the option “Enabled” to enable this task for the user

Now hit the ok button and proceed to next step.
#Step -4
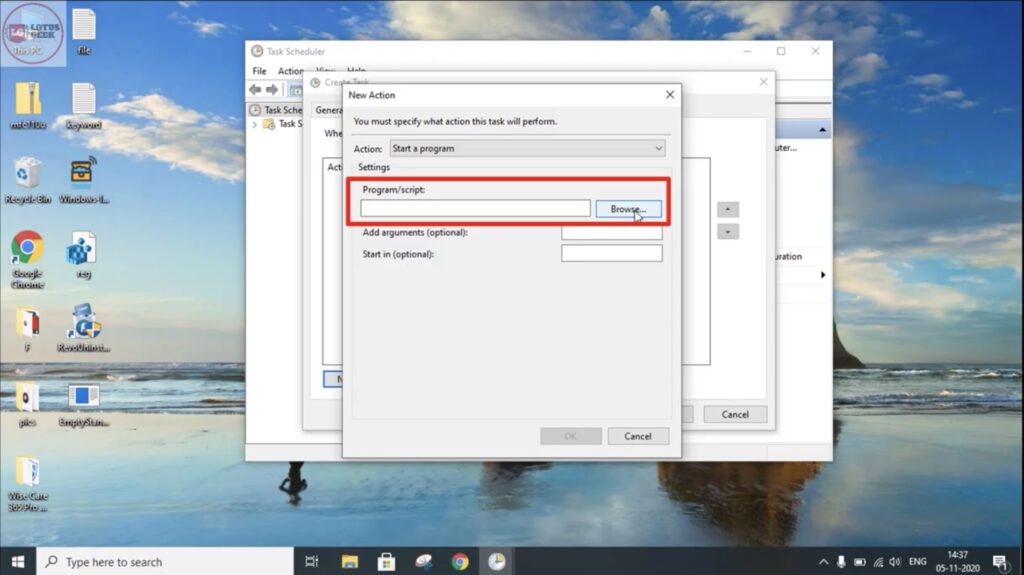
Now go ahead and choose “Action” tab and click on “New” button to create new action
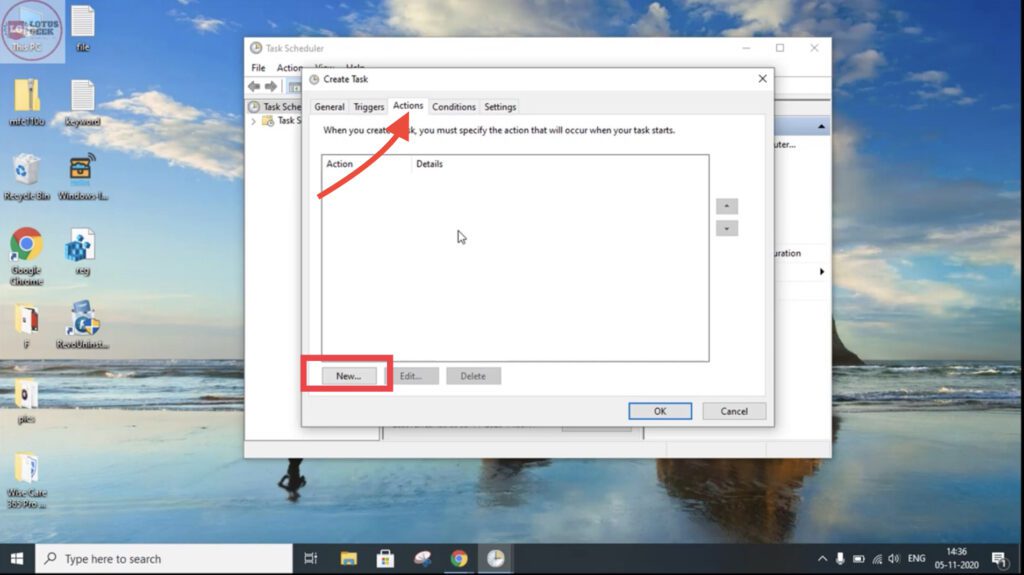
In the new tab window, as shown below click on the “browse” button under the settings tab to browse the program that we have just downloaded “Empty stand by List”
After choosing the program, hit the ok button to proceed as shown in the image below.
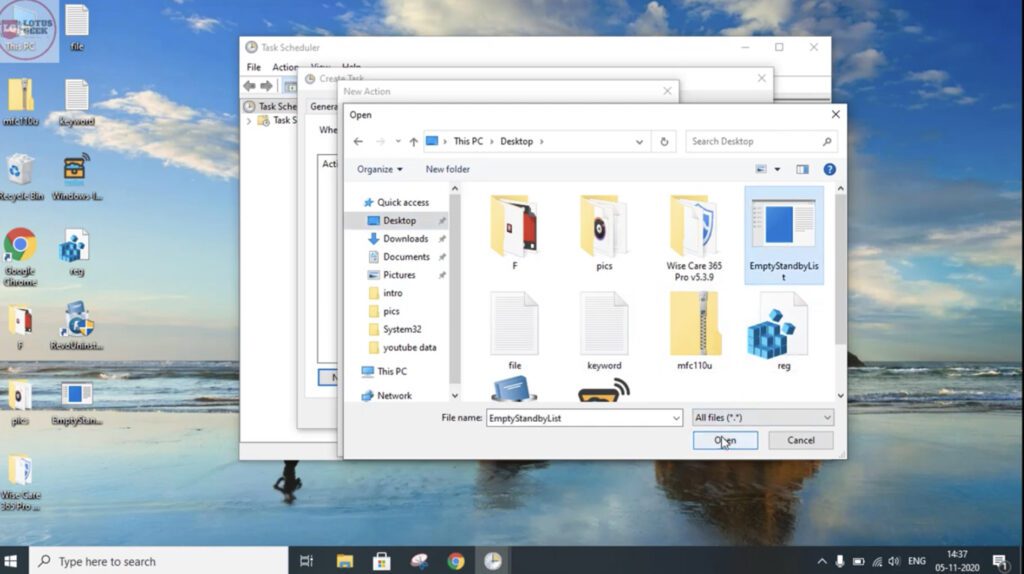
Now again hit the ok button in the “Action” tab to set the program.
Now in the main window of “Task Scheduler” click on the refresh button the start the process without any delay.

Now go ahead and close the “Task Scheduler”
that’s it you have to do in order to automatically clear RAM cache memory in windows 10.
How to Delete the Task :
If ever you have changed your mind or for whatever reason you wanted to delete this task of “automatically clear RAM cache memory in windows 10 than follow this simple step to delete the task permanently.
Again run the “Task Scheduler” as shown in the above method. In the “Task Scheduler” window, you have three sections. Choose the section to your left and click on “Task Scheduler Library”

In the middle section, find the name of the program that we just created. Make sure you choose the name of the program as shown. Now just right click on the program choose the “delete” option to delete this task from your system completely.

Thus, following the above mentioned steps you can easily automatically clear RAM cache memory in your windows PC and if you wanted to delete the task you can even delete the task hassle free.

