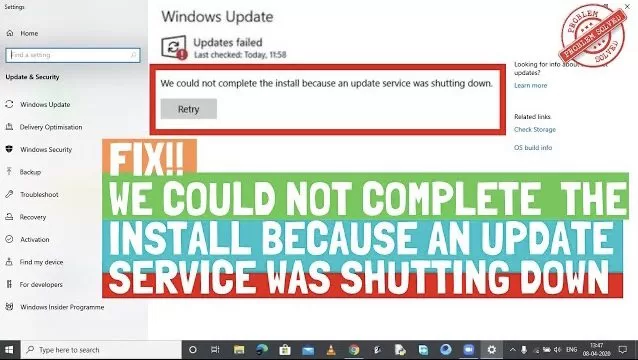
Once in a while while updating windows we all are stuck at different Windows Update error due to bugs inside windows or due to corrupted system files. One of those error is “We Could not Complete the Install because an Update Service was Shutting Down” in which updates are downloaded but they can’t installed. There are various reason for such error such as corrupted windows update database files, or due to inactivity of your windows update files for long time.
So here in this article we gonna fix this error by using five different troubleshooting steps.
Below are the steps to Fix “We Could not Complete the Install Because an Update Service was Shutting Down”
Here is the video tutorial to fix error “We Could not Complete the Install because an Update Service was Shutting Down”
#Method 1 – Fix We Could Not Complete the Install because an Update Service was Shutting Down Using Windows Troubleshooter
Sometimes, oldest but actually the effective method that works out is by using the windows default troubleshooter so that it can fix any error and than help you updating your windows.
Open your settings menu either by clicking on the start menu and than choose settings else simultaneously press Windows key + I key. This will open settings menu for you.
Now in settings menu, choose the option “Update and Security” to open the it’s sub features

Now in “Update and Security” menu click on the “Troubleshoot” tab to your left side and than choose “Additional troubleshooters” to open all the troubleshooters present in the system
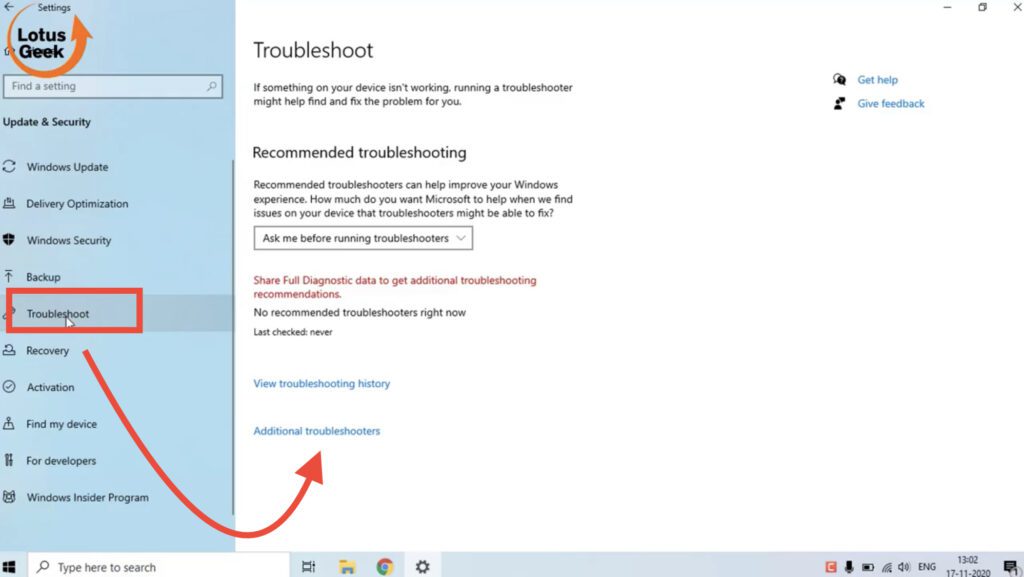
Once you click on “Additional troubleshooters” another window will open and find “Windows update troubleshooter” as shown below. Now click on “Windows update” and choose the option “Run the troubleshooter” to start diagnosing your system for any windows update error. Follow the guidelines of the troubleshooter.

After completing the troubleshoot, restart your system and check for windows update again and check if the error is resolved or not.
#Method 2 – Fix We Could not Complete the Install because an Update Service was Shutting Down by Using Windows Update Service
Another method to fix error “we could not complete the install because an update service was shutting down” is by checking whether windows update service is running in your system or not. Sometimes, we checked up everything but we forgot to check windows update service which is pretty basic step in solving windows update error.
So in this step we should check for windows update service.
Simultaneously press windows key + R key to open run command in your system.
Now type “Services.msc” in the run command and hit the enter key to open the services of your system.

Now in services menu, find an service “Windows update” it will be in alphabetical manner so scroll down to find the service.
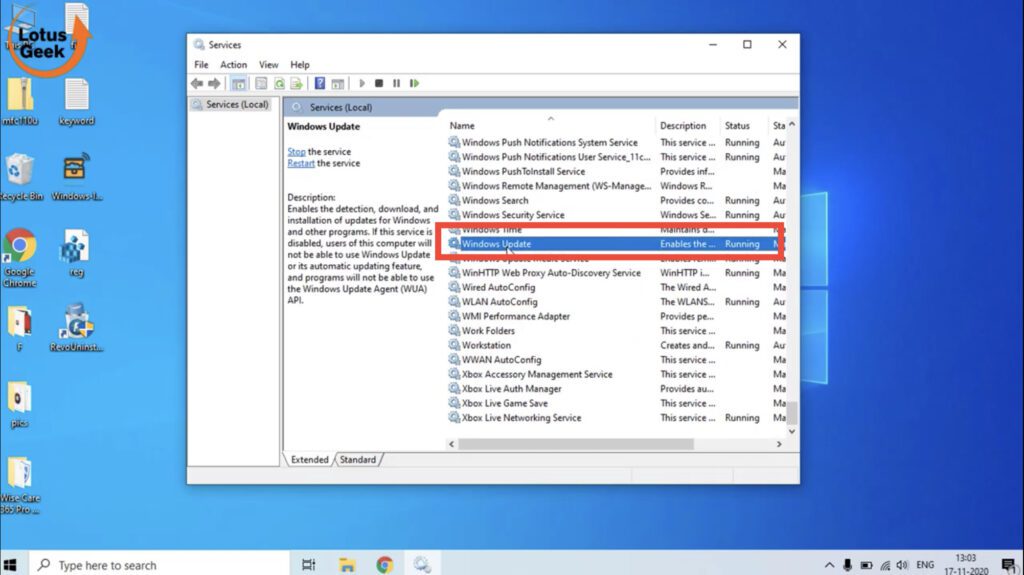
Now double click on “Windows update” service to open it’s properties section.
Here in the “Start up type” make sure it should be “automatic” if not click on the drop-down list and choose the option “automatic”
Now check “service status” it should be “Running” and if it’s stopped click on the “start” button to start the service immediately.

Now click on “Apply” button and hit “OK” button to save the changes.
Restart your system once this process is completed and again check for the updates.
#Method 3 – Fix We could not Complete the Install Because an Update Service was Shutting Down by Resetting Network Configuration
Many times we have noticed that it’s not your system but it’s your network which is causing windows updates error. So to fix this error you need to open the command prompt.
Click on the search box next to start menu and type “cmd”
Choose “run as administrator” option to run command as an administrator mode

In command prompt, type the following command one by one and hit the enter key after each command to process the command.
netsh winsock reset
netsh winsock reset proxy

Once the commands are processed successfully you will get an message saying “Successfully reset the Winsock catalog” and than it asks you to restart your system in order to complete the reset.
So, go ahead and restart your system. This process will reset your network process. You may check for the windows update now.
#Method 4 – Fix We Could not Complete the Install Because an Update Service was Shutting Down by Fixing Corrupted Windows Update Database
Many users have reported that there windows update data was corrupted which result in this error. So in this method we will go ahead and fix corrupted windows update database to resolve this issue.
First of all make sure all your “windows update” services are stopped and not working at all. If it’s in working state first stopped it and than proceed.
In order to stop “windows update” services open the “command prompt as an administrator” as shown in the above step and than type the following command one by one and the enter key after each command :
net stop cryptsvc
net stop bits
net stop wuauserv
net stop msiserver
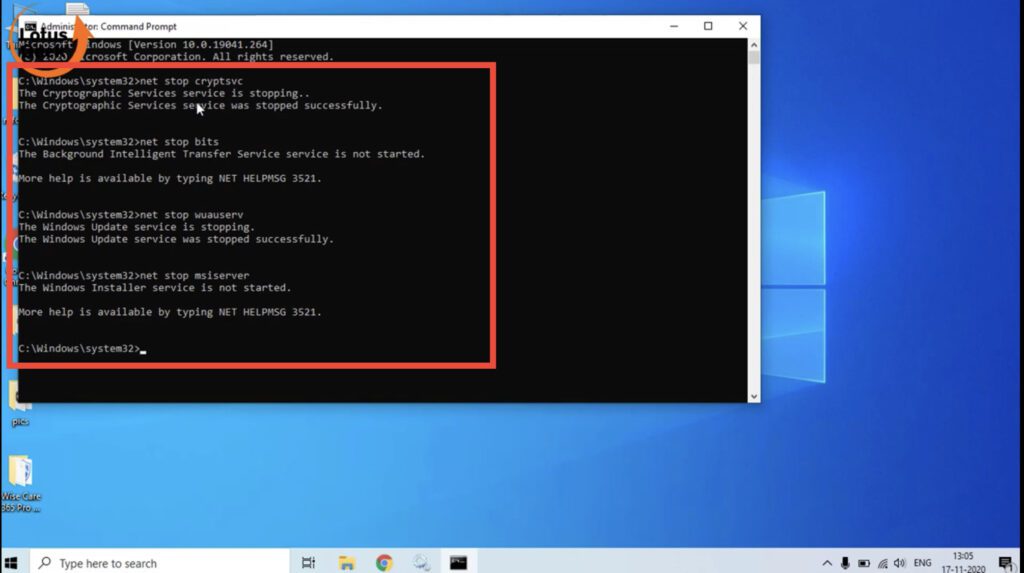
Now once these services are stopped now open your windows services to make sure that “windows update” service is also turned off.
Open your “Run command” by simultaneously pressing “windows key + R key” and type “services.msc” and hit enter to open windows service

Now find “windows update” service in the services menu

Open “Windows update” service and under “service status” check if it’s working or not and if it’s working click on the stop button to stop the service.

Now we are sure that all the windows update services are turned off our next step is to rename windows update folders present in your C drive.
To rename windows update folder locate the following path in your system :
This PC > Local Drive(C): > Windows > Software Distribution
Here rename the folder “Software distribution” to “Software Distribution.old”

After renaming “software distribution” folder now locate another path :
This PC > Local Drive(C): > Windows > sysWOW64 > Catroot
Now rename “Catroot” folder to “Catroot.old”
The trick is to create new windows update files. We can also delete these folder but it’s better to rename then to delete because if there is some problem these folder helps us to restore your system to previous stable state.
After renaming both the folders, our next step is to start the “windows update” services again.
Open your “command prompt as an administrator” and type following commands in the command prompt to start the windows update services :
net start cryptsvc
net start bits
net start wuauserv
net start msiserver
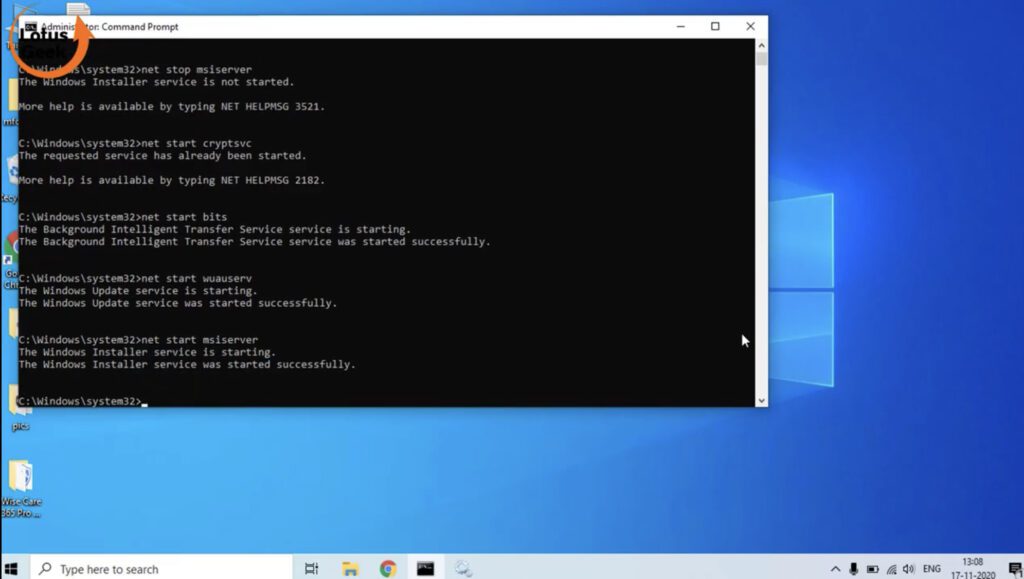
Now we have started all the windows update services again. Now close the command prompt and restart your system.
Go ahead and check for windows update again. If the problem still persists proceed to next step.
#Method 5 – Fix We Could not Complete the Install Because an Update Service was Shutting Down by Manually Updating Windows
If all the above method fails, our last option left is to update your windows PC downloading the windows update manually.
To update your system manually, you need to download windows assistance update tool from official Microsoft Website. Click on the link below to open the download page :
Now in the Microsoft Website click on the “Update Now” button to download the tool. Save it in your desktop or at your desired location. Tool is of around 6Mb so it won’t eat your space or data.

Now run the “Assistance tool” in your system. Once you run the program, the program will check your system for any updates if available.
Make sure you are connected to the internet while performing the action.

Once the tool search for the updates click on the “Update Now” button to update your windows PC.
These are the possible five ways to fix error “We Could not Install the Updates because an Update Service was Shutting Down” in your windows 10 PC. Still have any question or suggestion kindly comment below.

